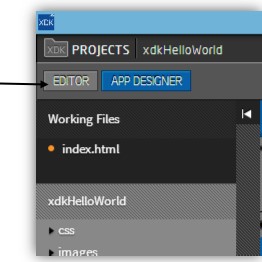
First of all, in the upper left hand part, on the menu bar at the top of our file hierarchy, click the button Editor.

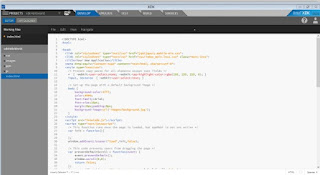
Then we will be given a code editor view program filled with letters and characters such as the following:

File hierarchy on the bar, make sure that the selected file is the index.html file for ensure that the program code that is currently open is the program code belongs index.html.

Then we will be given a code editor view program filled with letters and characters such as the following:

File hierarchy on the bar, make sure that the selected file is the index.html file for ensure that the program code that is currently open is the program code belongs index.html.
Next, let's focus on open source code editor, and let's begin activity coding. The language that will be used are the HTML language, seen from the file extensions that are we open, ie .html. Probably most of you are familiar with HTML language this. For those not familiar, can learn more about HTML language on the module Special Session of the HTML language. Modules are widely available in HTML, books that discuss special about HTML language was widely available in bookstores.
Yes, seriously, we will create mobile applications using HTML language passable familiar to you. Really the HTML language. Additionally there may be in code Javascript which we will add and code of additional libraries. For know how easy, let's get started.
First of all, let's see the result of our work before adding the element on the canvas. Drag and drop the activity actually will automatically generate HTML code. Please scroll your code until you find a code like the following:
<div class = "widget-container content-area vertical-col">
We mean program code is program code within the <div> that. If there is a slight difference, no problem, there may be differences when Intel XDK generating code of our program. On the lines of program code below, look at the program code section:

It is a line of code that is generated when we create a Button element. In section indicated arrows, it is the results generated code of attributes that we input when creating the button. There is an attribute Id and Label. Then look also on the line following code:
It is a line of code that is generated when we create a Button element. In section indicated arrows, it is the results generated code of attributes that we input when creating the button. There is an attribute Id and Label. Then look also on the line following code:
Can guess and find yourself element is it? Yes, it is an element Text with the id attribute "txtHelloWorld" and Text "first application in Intel XDK". In conclusion, when we do the layouting with App Designer, we actually was to shorten our work step by allowing Intel XDK generate HTML code for our own.
Now, let's go to the stage of the action program giving orders. Please find the line of code the following program:
Seen in the program code line numbers in the picture above, it appears that the lines of code The program is on the line 25-49. Or maybe disparate thin on the line of code program belongs to you. It is a program code by the JavaScript language. On the development of applications using the Intel XDK or other HTML5 applications, command code program for action using the JavaScript language. The above code is the code basic commands are automatically generated by Intel XDK.
Now we will add a code to command the new program of action, we will save the code before the tag on the bottom of the lid element </ script> namely as indicated by arrows in the figure below:
Lines of source code is as follows, please typed in that section:
showHelloWorld function () {
$ ("# txtHelloWorld"). text ("Hello World Intel XDK");
}
So the appearance of the lines of program code is as follows:
Perhaps most of you not familiar with the intent of the program code. JavaScript is a language code with an additional jQuery Mobile library (which we have chosen at the beginning of the development of applications). The code is a function named showHelloWorld () that when called will replace text attributes to "Hello World Intel XDK" of an element in applications that have an id "TxtHelloWorld". Where elements in our application that has the id is Text we created earlier. In short, these functions when called will make Text elements that we created earlier changed Text attributes or contents of the text into "Hello World Intel XDK".
Next to be executed, the function must be called first showHelloWorld first. We will call these functions when the button Hello World we have created previously untouched (using a finger on the smartphone or if clicked on a computer PC).
The trick, first find the line of program code that is lines of program code which has generated Intel XDK for buttons that we have made, namely a line of code The following program we have discussed above when we first entered the display Editor code:
Add a new program code on <a> element before the closing tag in the form of elements brackets lid as shown in the arrow in the picture above. Code program are as follows:
ontouchstart = "showHelloWorld ()"
So that the lines of code to the button is as follows:

Visible now that in addition to the class attribute, a data-UIB, a data-role, and id, there is a new attribute that is ontouchstart. This attribute serves to defines that when the elements get a touch on the input form device later (on the PC in the form of clicks), it will call the function showHelloWorld () that we have created and defined previously.
In the next article will discuss how to run an application that we created the Intel XDK emulator application.


0 comments:
Post a Comment