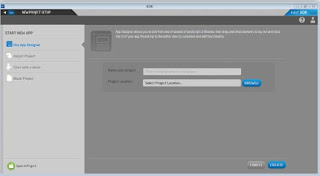
Hello World application on Intel XDK. This time, to try out some of the features and tools on Intel XDK let us make a project application that is simple Hello World application. Let's create a new project using the App Designer.
Creating the Project
At the beginning of Intel XDK, select Start a New Project and select Use App Designer as a method of making a project that we will use.

Name the project that will be created with the name xdkHelloWorld and please specify Storage folder location of the project.
Click the Create button to start the process of making the project.
After we finished the project made by Intel XDK, it will appear that
our project has been successfully created and is ready to be developed further. Please close the pop
Success up that appears.
Add the elements of the application
Now, time to start working. On the bar left visible hierarchy file of our project. Please click on the index.html file.
It will open on the bar code editor view of the index.html file.
Then click on the App Designer at the top of the bar to the left to open App Designer toolbar display.
Editor blades then we will turn into blades App Designer and for the first time, we UI framework will be asked to choose which one we will use.
Select the jQuery Mobile framework and click the Select button.
Then the typical appearance App Designer canvas will appear along with our application and we can free activity drag and drop to add elements and melayout elements in our application.
Controls on the bar, on the Form, please drag it onto the canvas a Button element.
So that the display on the canvas will be like this:
With the button we just created is still selected, on the bar Button Settings, contents Label with the "Hello World Button", then check the id and the contents of the "btnHelloWorld".
Charging label is to change the text on the button in the screen display and charging id is to define the id of the key to use in the code program later. Views on canvas of us now is like this:
Next we will add a text in our canvas. Controls on the bar, part Media, drag and drop text to the bottom buttons we have made btnHelloWorld previously.
So that the display on the canvas will be as follows:
Then still with the text that is selected, on the bar Text Settings, Text contents with "My First Application on Intel XDK". Then check Id, and the contents of the "txtHelloWorld.
Then we will look at the canvas as follows:
Addition and layouting elements in our application is enough, now we continue on coding alias clicking the program code. Earlier, let's try our application tests by clicking on the menu button Emulate stages of development in the above.
When the button is clicked, it is likely there will be alert to save the demand for our application if we do not save and please select Yes.
And here is the view of our application is being emulated in the virtual device, for example below is a virtual device iPhone 5:
Quite right? If we click on the button Hello World Button we have made it not there will be nothing. Why? Obviously because we have not instructed any action on the key. Therefore, let us return to Develop by clicking Develop a button on the menu stages of development at the top.
Now, it's time we do the typing activity. Ready for typing? okay, we discuss in the next article for the action program.


0 comments:
Post a Comment