Friday, March 27, 2015

The Rebirth of Authoring? Making iPad apps with LiveCode

I recently was asked if I'd heard of an authoring tool for creating iPad apps called LiveCode.

I don't know if you know, but LiveCode is like the only living grandchild of a tool called HyperCard. And you might not also know, that like the post punk band, Killing Joke, HyperCard is one of those subjects that makes me want to sit you down and tell you stories from days of yore. For EVER.

You see, HyperCard was the tool that I first did any programming with, back in 1991. The Apple Macintosh was billed as "The Computer For The Rest Of Us"... and HyperCard, bundled free with every Macintosh was "Programming For The Rest Of Us".

But before I can regale you with tales of HyperCard's features, you need to understand the context from which HyperCard sprang. You have to do some homework.

Your Homework


You have to go back to 1945,  a the time when Vannevar Bush outlined how a conceptual HyperText machine called Memex would work, and how trails would be created through linked documents. Fascinating!

You have to go to 1960 and learn about Ted Nelson and what the word "Intertwingularity" means.

Then it's back to 1968, and to Doug Engelbart's Mother Of All Demos, in which he shows off the inventions of a Graphical User Interface ( GUI ) and a mouse and networking and collaboration. Watch this video ( it's a bit slow but edifying ). It astonishes me how many ideas we still haven't grasped yet in what he was working on.

It's now the 1970's when Randy Smith demo'ed the Alternate Reality Kit, and you start to see the importance of the direct manipulation of objects on screen.

It was the work going on at Xerox Parc ( Doug and Randy's amongst others ) that Steve Jobs saw, got inspired and went off to make the Macintosh.


And then here in 1984, here is HyperCard's maker, Bill Atkinson, demoing HyperCard. What I find fascinating about this video is how awkward the terminology they use for what's on screen. It is so new, they don't really know how to even talk about it.

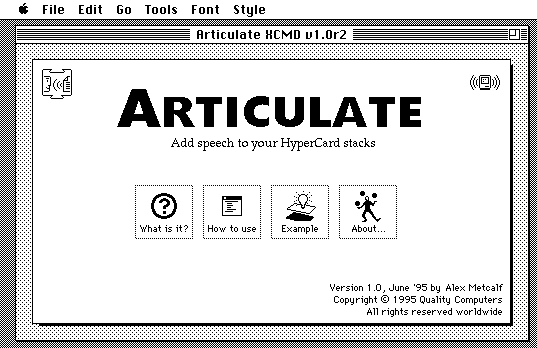
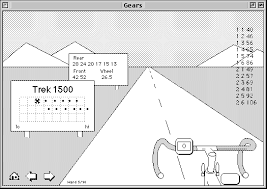
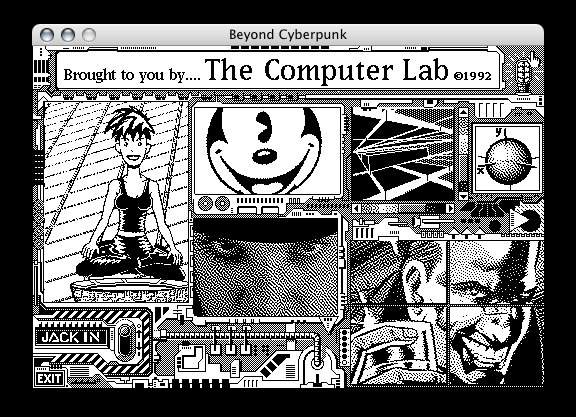
With HyperCard you created stacks of cards, and on those cards you put buttons and text fields and graphics... and in those objects you put simple code that did wonderful interactive things.

People used HyperCard to make all sorts of stacks. From tools, to stories, to adventure games to learning materials to anything.


The Demise of HyperCard


And then it was no more, for all sorts of reasons. Steve Jobs closed down HyperCard ( I imagine mainly because people made some really ugly stacks ) and the web has just happened. The whole concept of authoring seemed to fade away. The hypertext of the web was very different from HyperCards stacks. 

The notion of authoring limped on awhile. There was a commercial (and colour) version of HyperCard called SuperCard. Oracle created a tool called Oracle Media Objects. Macromind made Director and then Flash. But none of these grabbed the collective imagination like HyperCard did.

A few years ago I heard of a HyperCard-like tool called Revolution from a company called RunRev. I tried it, liked it, but couldn't quite see the relevance of writing stacks anymore. And I think Revolution evolved into LiveCode ( correct me if I'm wrong ).


LiveCode


But now, with LiveCode, everything has changed. There's a Community version ( free ) and your LiveCode stacks can be saved as iOS or Android apps with HTML5 under-development. Your stacks can talk to your servers. Your stacks can embed browsers. Authoring is relevant again.

I ran LiveCode up and within minutes, had created a simple interactive map of the Museum Gardens in York, that presumably I can compile and run on an iPad tablet. It felt like the "old days", creating cards, adding buttons and adding code like this...

on mouseup
      go to card "Prairie"
end mouseup

...how easy is that? 


The Project

The project we are hoping to use LiveCode for, involves Archaeology students exploring Paris, and creating interpretations of what they find ( textual, audio and images ) and then designing an app to share that work. The department has a number of iPads which will enable them to use their stacks in the location. It's likely that the stacks will be authored on a variety of devices ( Mac, Windows, Android ).

Ideally, I would have liked a tool that saved an app as HTML5 ( this feature is in production at LiveCode ). That way, there would be no need to work with Apple's App Store ( and its Ad Hoc licensing ) and the students' work would also work on the web and on an Android tablet ( should they have one ). 

The Alternatives

Whilst looking for HTML5 tools, it's worth mentioning a few that may be of use later.

Maqetta is a browser-based open source project to create HTML5 content. It looked promising but the interface beat me. I was unable to use states to change the scene.


Animatron uses a timeline metaphor, an again, looked promising but probably is more aimed at animation than simple stack creation. A great tool but not quite the right tool in this case.


Silex has a beautifully simple approach to creating HTML5 content ( to which you can add HTML that does the bits that it maybe doesn't do, for example, play audio or video ). I actually wanted a little more control than this tool gave me, but I did manage to make an interactive HTML5 piece with it in a very short time.


Apple's iBooks Author is worth a mention, in that you can create rich media documents with images and videos that can then be viewed on an iPad ( via the iBooks store ). It doesn't really suit creating interactive media though, being more based on creating a page by page stream of information. I must say I was put off by the whole "you can't publish anywhere else" licensing issue Apple have decided to give to iBooks Author content. Especially when compared to LiveCode's obvious "community" goodwill feelgood factor. 

I also considered Hype, the excellent HTML5 animation creator, but again, this tool's metaphor ( creating animations on a timeline ) could be pressed into creating hypermedia, but would be a bit of a stretch.

Both of these would have required Macs to author, which wouldn't have been ideal.


Conclusions

It's great fun to be playing with a distant relative of HyperCard again, it is so easy to create things and I look forward to working out how to compile and run stacks on iOS ( which means we'll have to get an Apple Developer account at $99 ... sigh... still ).


I Want To Improve My Spreadsheet


I often get people coming to visit me who have a spreadsheet they want to get more from. They either want to automate certain tasks, or create new sheets with aggregated data or share data with colleagues in new ways. The hope is that with a little bit of code, new vistas will open up.

Often the data is in a spreadsheet, it isn't clean enough to do anything useful with. If code is to stand a chance at making a spreadsheet more useful, then the data itself needs to be "code ready".

Below is an actual spreadsheet brought to me, with number of areas for that needed data cleaning.


As we worked together, we realised, a healthy spreadsheet isn't just about making sure your data is logical, there are also other factors that contribute to how easy your data will be to work with.

  • Use formulas well - A few easy to learn formulas can significantly ramp up what you can do quickly with data. It is worth investing even just a few minutes learning new formulas and what they can do for you.
  • Prevent errors - Make sure you validate data where you can, and help people not to make your data grubby.
  • Improve the interface - With Google Spreadsheets you can add menus, actions and buttons and even sidebars that can turn a spreadsheet chore into a breeze.
  • Use the charts and visualisations - Getting more out of your data can be as easy as creating a well designed dashboard using Google Spreadsheet's inbuilt charts.

Here is my list of suggestions for how to make this spreadsheet's data "code ready" in a Google Doc.

There are heaps of short videos on Google Gooru's YouTube page. In minutes you can be learning new features and taming those scary spreadsheets.


Stunning Student Work in the 3Sixty at York

Sara Perry taught the Archaeology module to design an exhibition for the 3Sixty space at York. This year the students really went beyond all expectations and produced some stunning and innovative work that made full use of the space's abilities.

One piece, about Clifford's Tower, made use of numerous live action actors to deliver snippets of spoken word from the time. The presentation had moments where spotlights illuminated the actors in the room ( see below ).


When this piece put you in a 3D model of Clifford's Tower, slowly flying around it, it was actually breathtaking.


What is shown here is only a facsimile of the real experience ( of course the actors aren't acting for us in it ) but it does give you some idea of how well the piece was choreographed and how professionally the students wove their ideas into a compelling experience.

I was involved in helping to take their work and make it viewable using a Javascript 3D library called Three.js.


You will need Chrome/Firefox to view the piece: here

Remember, this is without the real actors. The experience is about 6 minutes long and was designed to integrate with offline museum activities and exhibition spaces.


Preparing Media For The 3Sixty Space at York


In a recent student project to create archaeological exhibitions in the 3Sixty space we needed to look at how to easily chop a very wide movie into four separate smaller movies.

There are lots of templates to help you present in the 3Sixty space, including Powerpoint files but we also needed a way to view the presentations NOT in the space itself which would require some form of 3D version of a 2D presentation shown in real 3D. Are you keeping up? We needed a version of the presentation that could be viewed on screen rather than in the room.

I found a python library that would let you edit videos using code called MoviePy. It's brilliant! You can do video-in-video effects, split panel videos, animations, freeze frames and all sorts.

So, with the code below, we were able to take a VERY WIDE movie generated by the Powerpoint template being exported as a movie... and make four separate movie files, one for each wall.


from moviepy.editor import *
from moviepy.video.fx.all import *

movie_file = "/Library/WebServer/Documents/Three.js/ExportedFromPowerpoint.mp4"
w = 1440 #3840 #width of full movie
h = 244 #600 #height of full movie
s = w / 4 #individual screen size i.e 960
print "Chopping..." #.subclip((0,0.0), (1,10.0))

clip1 = (VideoFileClip(movie_file))
wall1 = crop(clip1, x1=0, y1=0, x2=s, y2=h) #Wall 1
#wall1 = wall1.without_audio()
wall1.write_videofile("wall1.mp4", codec='libx264')
print "Chopped: wall1.mp4", wall1.duration, "seconds long."


clip2 = (VideoFileClip(movie_file))
wall2 = crop(clip2, x1=s, y1=0, x2=s*2, y2=h) # Wall 2
wall2 = wall2.without_audio()
wall2.write_videofile("wall2.mp4", codec='libx264')

print "Chopped: wall2.mp4", wall2.duration, "seconds long."

clip3 = (VideoFileClip(movie_file))
wall3 = crop(clip3, x1=s*2, y1=0, x2=s*3, y2=h) # Wall 3
wall3 = wall3.without_audio()
wall3.write_videofile("wall3.mp4", codec='libx264')
print "Chopped: wall3.mp4", wall3.duration, "seconds long."

clip4 = (VideoFileClip(movie_file))
wall4 = crop(clip4, x1=s*3, y1=0, x2=s*4, y2=h) # Wall 4
wall4 = wall4.without_audio()
wall4.write_videofile("wall4.mp4", codec='libx264')
print "Chopped: wall4.mp4", wall4.duration, "seconds long."

print "Chopped: All done!"

It's worth noting that we only needed audio on one of the movies, otherwise four tracks of the same audio played causing a weird echo effect.  Also, unless the codec was libx264, the movies didn't load into the Three.js space.

After this we were then able to use the movies in a 3D simulation of the room.

See how this was used here.

Sunday, March 22, 2015

Android Tutorial for Beginners 26 # Android TimePicker Dialog ( TimePic...


1
2
3
4
5
6
7
8
9
10
11
12
13
14
15
16
17
18
19
20
21
22
23
24
25
26
27
28
29
30
31
32
33
34
35
36
37
38
39
40
41
42
43
44
45
46
47
48
49
50
51
52
53
54
55
56
57
58
59
60
61
62
63
64
65
66
67
68
69
70
71
72
73
74
75
76
77
78
79
package com.example.programmingknowledge.timepickerdialogexample;

import android.app.Dialog;
import android.app.TimePickerDialog;
import android.support.v7.app.ActionBarActivity;
import android.os.Bundle;
import android.view.Menu;
import android.view.MenuItem;
import android.view.View;
import android.widget.Button;
import android.widget.TimePicker;
import android.widget.Toast;


public class MainActivity extends ActionBarActivity {
Button button_stpd;
static final int DIALOG_ID = 0;
int hour_x;
int minute_x;
@Override
protected void onCreate(Bundle savedInstanceState) {
super.onCreate(savedInstanceState);
setContentView(R.layout.activity_main);
showTimePickerDialog ();
}


public void showTimePickerDialog () {
button_stpd = (Button)findViewById(R.id.button);
button_stpd.setOnClickListener(
new View.OnClickListener() {
@Override
public void onClick(View v) {
showDialog(DIALOG_ID);
}
}
);
}

@Override
protected Dialog onCreateDialog(int id) {
if (id == DIALOG_ID)
return new TimePickerDialog(MainActivity.this, kTimePickerListner, hour_x,minute_x,false);
return null;
}

protected TimePickerDialog.OnTimeSetListener kTimePickerListner =
new TimePickerDialog.OnTimeSetListener() {
@Override
public void onTimeSet(TimePicker view, int hourOfDay, int minute) {
hour_x = hourOfDay;
minute_x = minute;
Toast.makeText(MainActivity.this,hour_x + " : " +minute_x,Toast.LENGTH_LONG).show();
}
};


@Override
public boolean onCreateOptionsMenu(Menu menu) {
// Inflate the menu; this adds items to the action bar if it is present.
getMenuInflater().inflate(R.menu.menu_main, menu);
return true;
}

@Override
public boolean onOptionsItemSelected(MenuItem item) {
// Handle action bar item clicks here. The action bar will
// automatically handle clicks on the Home/Up button, so long
// as you specify a parent activity in AndroidManifest.xml.
int id = item.getItemId();

//noinspection SimplifiableIfStatement
if (id == R.id.action_settings) {
return true;
}

return super.onOptionsItemSelected(item);
}
}


1
2
3
4
5
6
7
8
9
10
11
12
13
14
15
16
<RelativeLayout xmlns:android="http://schemas.android.com/apk/res/android"
xmlns:tools="http://schemas.android.com/tools" android:layout_width="match_parent"
android:layout_height="match_parent" android:paddingLeft="@dimen/activity_horizontal_margin"
android:paddingRight="@dimen/activity_horizontal_margin"
android:paddingTop="@dimen/activity_vertical_margin"
android:paddingBottom="@dimen/activity_vertical_margin" tools:context=".MainActivity">

<Button
android:layout_width="wrap_content"
android:layout_height="wrap_content"
android:text="Show Time Piker Dialog"
android:id="@+id/button"
android:layout_marginTop="151dp"
android:layout_alignParentTop="true"
android:layout_centerHorizontal="true" />
</RelativeLayout>


Searches related to timepickerdialog

timepickerdialog example

datepickerdialog

timepickerdialog theme

timepickerdialog source code

timepickerdialog get time

timepickerdialog get timepicker

timepickerdialog title

timepickerdialog cannot be resolved to a type

Friday, March 20, 2015

Android Tutorial for Beginners 24 # Android AutoCompleteTextView Control


1
2
3
4
5
6
7
8
9
10
11
12
13
14
15
16
<RelativeLayout xmlns:android="http://schemas.android.com/apk/res/android"
xmlns:tools="http://schemas.android.com/tools" android:layout_width="match_parent"
android:layout_height="match_parent" android:paddingLeft="@dimen/activity_horizontal_margin"
android:paddingRight="@dimen/activity_horizontal_margin"
android:paddingTop="@dimen/activity_vertical_margin"
android:paddingBottom="@dimen/activity_vertical_margin" tools:context=".MainActivity">

<AutoCompleteTextView
android:layout_width="match_parent"
android:layout_height="wrap_content"
android:id="@+id/autoCompleteTextView"
android:layout_alignParentTop="true"
android:layout_marginTop="125dp"
android:layout_alignParentLeft="true"
android:layout_alignParentStart="true" />
</RelativeLayout>


1
2
3
4
5
6
7
8
9
10
11
12
13
14
15
16
17
18
19
20
21
22
23
24
25
26
27
28
29
30
31
32
33
34
35
36
37
38
39
40
41
42
43
44
45
46
47
48
49
50
51
52
53
54
55
56
57
58
59
60
package com.example.programmingknowledge.sampleapp;

import android.support.v7.app.ActionBarActivity;
import android.os.Bundle;
import android.view.Menu;
import android.view.MenuItem;
import android.widget.ArrayAdapter;
import android.widget.AutoCompleteTextView;


public class MainActivity extends ActionBarActivity {
AutoCompleteTextView acTextView;
String[] counties = {
"Afghanistan",
"Albania",
"Algeria",
"Andorra",
"Angola",
"Antigua and Barbuda",
"Argentina",
"Armenia",
"Australia",
"Austria",
"Azerbaijan",
};
@Override
protected void onCreate(Bundle savedInstanceState) {
super.onCreate(savedInstanceState);
setContentView(R.layout.activity_main);

acTextView = (AutoCompleteTextView)findViewById(R.id.autoCompleteTextView);
ArrayAdapter adapter = new ArrayAdapter(this,android.R.layout.select_dialog_item,counties);

acTextView.setThreshold(1);
acTextView.setAdapter(adapter);
}


@Override
public boolean onCreateOptionsMenu(Menu menu) {
// Inflate the menu; this adds items to the action bar if it is present.
getMenuInflater().inflate(R.menu.menu_main, menu);
return true;
}

@Override
public boolean onOptionsItemSelected(MenuItem item) {
// Handle action bar item clicks here. The action bar will
// automatically handle clicks on the Home/Up button, so long
// as you specify a parent activity in AndroidManifest.xml.
int id = item.getItemId();

//noinspection SimplifiableIfStatement
if (id == R.id.action_settings) {
return true;
}

return super.onOptionsItemSelected(item);
}
}


Android Auto Complete Tutorial

Adding Place Autocomplete to your Android App

android - How do I Use AutoCompleteTextView

android - How to dynamically add suggestions

android widget AutoCompleteTextView.java

Searches related to autocompletetextview

autocompletetextview custom adapter

Searches related to Android AutoCompleteTextView Control

android autocompletetextview example

android autocompletetextview custom adapter

android autocompletetextview from database

android autocompletetextview get selected item

android autocompletetextview dropdown

android autocompletetextview sqlite

android autocompletetextview not showing suggestions

android autocompletetextview arrayadapter

Android Tutorial for Beginners 22 # Fragments in Android - Part 1


1
2
3
4
5
6
7
8
9
10
11
<FrameLayout xmlns:android="http://schemas.android.com/apk/res/android"
xmlns:tools="http://schemas.android.com/tools" android:layout_width="match_parent"
android:layout_height="match_parent"
tools:context="com.example.programmingknowledge.fragmentexample.FragmentOne"
android:background="#ff36ff20">

<!-- TODO: Update blank fragment layout -->
<TextView android:layout_width="match_parent" android:layout_height="match_parent"
android:text="@string/hello_blank_fragment" />

</FrameLayout>


1
2
3
4
5
6
7
8
9
10
11
<FrameLayout xmlns:android="http://schemas.android.com/apk/res/android"
xmlns:tools="http://schemas.android.com/tools" android:layout_width="match_parent"
android:layout_height="match_parent"
tools:context="com.example.programmingknowledge.fragmentexample.FragmentTwo">

<!-- TODO: Update blank fragment layout -->
<TextView android:layout_width="match_parent" android:layout_height="match_parent"
android:text="@string/hello_blank_fragment"
android:background="#ffff1b19" />

</FrameLayout>


1
2
3
4
5
6
7
8
9
10
11
12
13
14
15
16
17
18
19
20
21
22
23
24
25
26
27
28
29
30
<LinearLayout xmlns:android="http://schemas.android.com/apk/res/android"
xmlns:tools="http://schemas.android.com/tools" android:layout_width="match_parent"
android:layout_height="match_parent" android:paddingLeft="@dimen/activity_horizontal_margin"
android:paddingRight="@dimen/activity_horizontal_margin"
android:paddingTop="@dimen/activity_vertical_margin"
android:paddingBottom="@dimen/activity_vertical_margin" tools:context=".MainActivity"
android:id="@+id/myLayout"
android:orientation="vertical">

<Button
android:layout_width="match_parent"
android:layout_height="wrap_content"
android:text="Fagment1"
android:id="@+id/button"
android:onClick="ChangeFragment" />

<Button
android:layout_width="match_parent"
android:layout_height="wrap_content"
android:text="Fragment2"
android:id="@+id/button2"
android:onClick="ChangeFragment" />
<fragment
android:name="com.example.programmingknowledge.fragmentexample.FragmentOne"
android:id="@+id/fragment_place"
android:layout_width="match_parent"
android:layout_height="match_parent"

></fragment>
</LinearLayout>


1
2
3
4
5
6
7
8
9
10
11
12
13
14
15
16
17
18
19
20
21
package com.example.programmingknowledge.fragmentexample;

import android.app.Activity;
import android.net.Uri;
import android.os.Bundle;
import android.app.Fragment;
import android.view.LayoutInflater;
import android.view.View;
import android.view.ViewGroup;


public class FragmentOne extends Fragment {

@Override
public View onCreateView(LayoutInflater inflater, ViewGroup container,
Bundle savedInstanceState) {
// Inflate the layout for this fragment
return inflater.inflate(R.layout.fragment_fragment_one, container, false);
}

}


1
2
3
4
5
6
7
8
9
10
11
12
13
14
15
16
17
18
19
20
package com.example.programmingknowledge.fragmentexample;

import android.app.Activity;
import android.net.Uri;
import android.os.Bundle;
import android.app.Fragment;
import android.view.LayoutInflater;
import android.view.View;
import android.view.ViewGroup;


public class FragmentTwo extends Fragment {
@Override
public View onCreateView(LayoutInflater inflater, ViewGroup container,
Bundle savedInstanceState) {
// Inflate the layout for this fragment
return inflater.inflate(R.layout.fragment_fragment_two, container, false);
}

}


1
2
3
4
5
6
7
8
9
10
11
12
13
14
15
16
17
18
19
20
21
22
23
24
25
26
27
28
29
30
31
32
33
34
35
36
37
38
39
40
41
42
43
44
45
46
47
48
49
50
51
52
53
54
55
56
57
58
59
60
package com.example.programmingknowledge.fragmentexample;

import android.support.v7.app.ActionBarActivity;
import android.os.Bundle;
import android.view.Menu;
import android.view.MenuItem;
import android.app.Fragment;
import android.app.FragmentManager;
import android.app.FragmentTransaction;
import android.view.View;

public class MainActivity extends ActionBarActivity {

@Override
protected void onCreate(Bundle savedInstanceState) {
super.onCreate(savedInstanceState);
setContentView(R.layout.activity_main);
}

public void ChangeFragment(View view){
Fragment fragment;

if( view == findViewById(R.id.button)) {
fragment = new FragmentOne();
FragmentManager fm = getFragmentManager();
FragmentTransaction ft = fm.beginTransaction();
ft.replace(R.id.fragment_place, fragment);
ft.commit();
}
if( view == findViewById(R.id.button2)) {
fragment = new FragmentTwo();
FragmentManager fm = getFragmentManager();
FragmentTransaction ft = fm.beginTransaction();
ft.replace(R.id.fragment_place, fragment);
ft.commit();
}
}

@Override
public boolean onCreateOptionsMenu(Menu menu) {
// Inflate the menu; this adds items to the action bar if it is present.
getMenuInflater().inflate(R.menu.menu_main, menu);
return true;
}

@Override
public boolean onOptionsItemSelected(MenuItem item) {
// Handle action bar item clicks here. The action bar will
// automatically handle clicks on the Home/Up button, so long
// as you specify a parent activity in AndroidManifest.xml.
int id = item.getItemId();

//noinspection SimplifiableIfStatement
if (id == R.id.action_settings) {
return true;
}

return super.onOptionsItemSelected(item);
}
}


Android Tutorial for Beginners 25 # Android TimePicker


1
2
3
4
5
6
7
8
9
10
11
12
13
14
15
16
17
18
19
20
21
22
23
24
25
26
27
28
29
30
31
32
33
34
35
36
37
38
39
40
41
42
43
44
45
46
47
48
49
50
51
52
53
54
55
56
57
58
59
package com.example.programmingknowledge.timepicker;

import android.support.v7.app.ActionBarActivity;
import android.os.Bundle;
import android.view.Menu;
import android.view.MenuItem;
import android.view.View;
import android.widget.Button;
import android.widget.TimePicker;
import android.widget.Toast;


public class MainActivity extends ActionBarActivity {
private TimePicker time_picker;
private Button button_show_time;
@Override
protected void onCreate(Bundle savedInstanceState) {
super.onCreate(savedInstanceState);
setContentView(R.layout.activity_main);
showTime();
}

public void showTime() {
time_picker =(TimePicker)findViewById(R.id.timePicker);
button_show_time = (Button)findViewById(R.id.button);
time_picker.setIs24HourView(true);
button_show_time.setOnClickListener(
new View.OnClickListener() {
@Override
public void onClick(View v) {
Toast.makeText(getBaseContext(),time_picker.getCurrentHour() +" : " + time_picker.getCurrentMinute(),
Toast.LENGTH_SHORT).show();
}
}
);
}

@Override
public boolean onCreateOptionsMenu(Menu menu) {
// Inflate the menu; this adds items to the action bar if it is present.
getMenuInflater().inflate(R.menu.menu_main, menu);
return true;
}

@Override
public boolean onOptionsItemSelected(MenuItem item) {
// Handle action bar item clicks here. The action bar will
// automatically handle clicks on the Home/Up button, so long
// as you specify a parent activity in AndroidManifest.xml.
int id = item.getItemId();

//noinspection SimplifiableIfStatement
if (id == R.id.action_settings) {
return true;
}

return super.onOptionsItemSelected(item);
}
}


1
2
3
4
5
6
7
8
9
10
11
12
13
14
15
16
17
18
19
20
21
22
23
24
25
26
27
<RelativeLayout xmlns:android="http://schemas.android.com/apk/res/android"
xmlns:tools="http://schemas.android.com/tools" android:layout_width="match_parent"
android:layout_height="match_parent" android:paddingLeft="@dimen/activity_horizontal_margin"
android:paddingRight="@dimen/activity_horizontal_margin"
android:paddingTop="@dimen/activity_vertical_margin"
android:paddingBottom="@dimen/activity_vertical_margin" tools:context=".MainActivity">

<TimePicker
android:layout_width="wrap_content"
android:layout_height="wrap_content"
android:id="@+id/timePicker"
android:layout_alignParentTop="true"
android:layout_alignLeft="@+id/timePicker"
android:layout_alignStart="@+id/timePicker"
android:layout_alignParentRight="true"
android:layout_alignParentEnd="true" />

<Button
android:layout_width="wrap_content"
android:layout_height="wrap_content"
android:text="Show Time"
android:id="@+id/button"
android:layout_alignParentBottom="true"
android:layout_alignLeft="@+id/timePicker"
android:layout_alignStart="@+id/timePicker"
android:layout_marginBottom="47dp" />
</RelativeLayout>


Searches related to timepicker android

datepicker android

timepicker ontimechangedlistener

timepicker android get time

timepicker android set time

custom timepicker android

timepicker android style

timepicker android xml

timepicker android 24 format

Android time picker example

Android Time Picker Tutorial

android - TimePicker Dialog from clicking EditText -

dialog - Android: How to get the time from a TimePicker

Android TimePicker Example

Android TimePicker Example Tutorial


© 2013 Klick Dev. All rights resevered.

Back To Top